INTED 2017 Conference Presentation

It was with great pleasure that I was able to present our paper on the use of podcasting to enhance and enrich international education along with some wonderful colleagues at the 11th International Technology, Education and Development Conference in Valencia Spain.  

We had a wonderful round of discussions and questions from the conference session attendees, and it was so inspiring to hear how many other educators are looking to integrate a project of this type to enrich the student learning experiences.  I can speak for the group when I say that we are looking forward to continuing the development of the project and will be sharing our "toolkit" soon under a Creative Commons License to ensure that it stays open and accessible to anyone who would like to adapt an integrate this type of project.

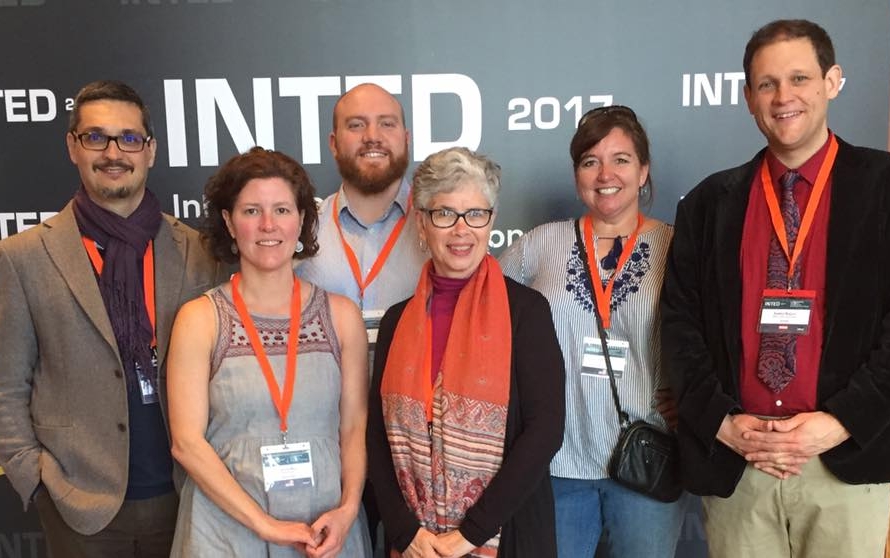
The International Podcast Project Team
Dr. Sean Leahy (Webster University Leiden Campus)
Prof Kit Jenkins (Webster University St. Louis Campus)
Julie Smith (Webster University St. Louis Campus)
Dr. Brad Wiggins (Webster University Vienna Campus)
Francesco Arese Visconti (Webster University Geneva)
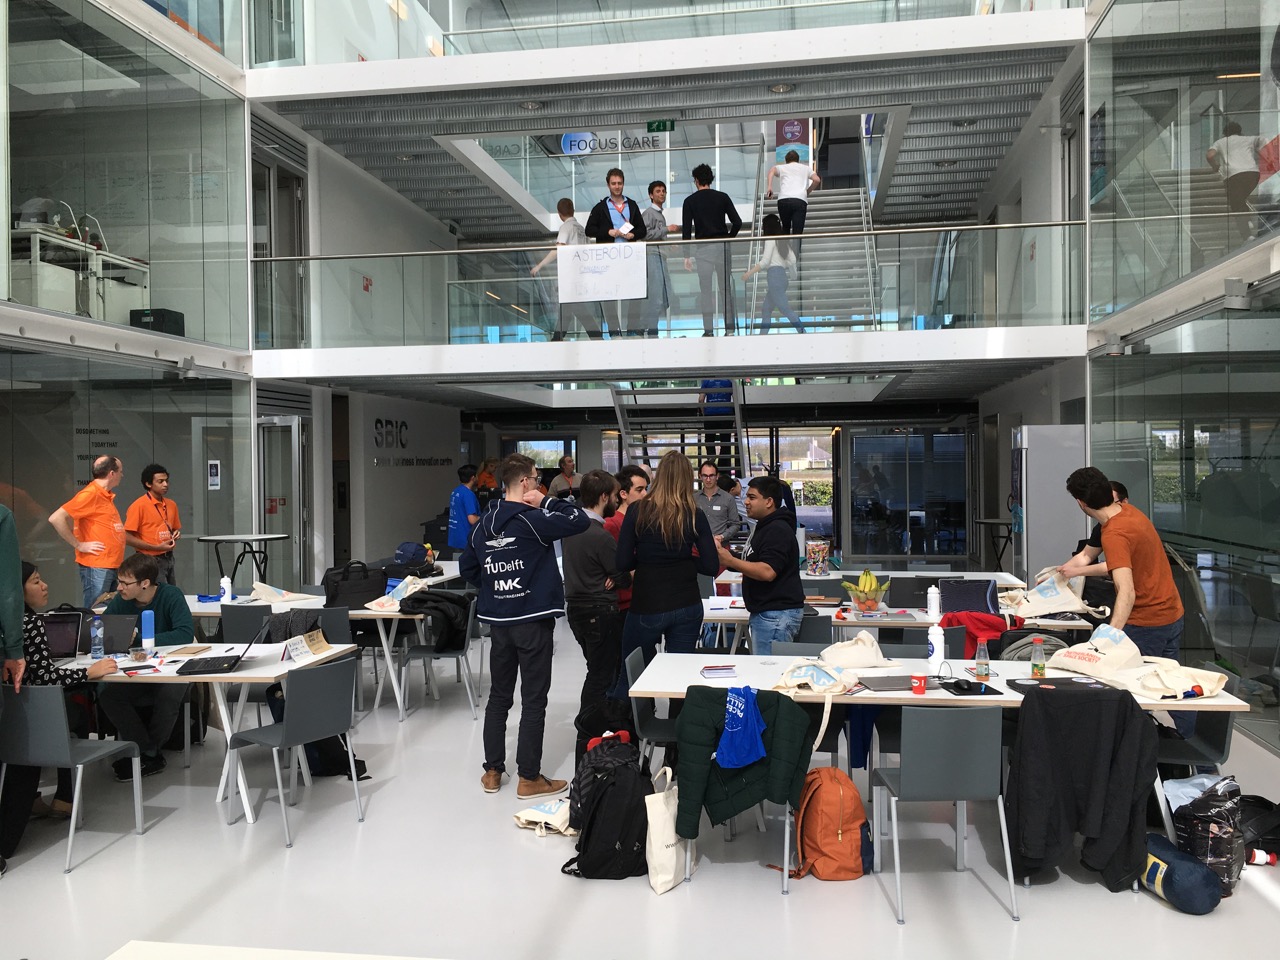
INTED is one of the largest international education conferences for lecturers, researchers, technologists and professionals from the educational sector. After 10 years, it has become a reference event where more than 700 experts from 80 countries will get together to present their projects and share their knowledge on teaching and learning methodologies, educational innovations and experiences in technology and development.
— https://iated.org/inted/

Our paper was entitled: INTERNATIONAL PODCAST PROJECT: USING PODCASTS TO ENRICH AND ENHANCE EXPERIENCES IN INTERNATIONAL EDUCATION.

Abstract
The purpose of this oral presentation is to share information on the outcomes of an international collaboration involving student-produced podcasts as a course requirement. This project took place across multiple campuses in the global network of Webster University. Students and instructors participated from the following campuses: St. Louis, Missouri (the university’s home campus), Leiden, The Netherlands, Geneva, Switzerland, and Cha-Am, Thailand, and Vienna, Austria. Podcasting has increasingly become a useful tool in nearly all aspects of learning, but perhaps even more so when students produce the podcasts as part of a course assignment (Ashraf, Noroozi, & Salami, 2011; Çölkesen & Bedir, 2016; Forbes, 2011). The concept of the International Podcast Project was to provide an active learning experience in which students participate in a global media project by choosing a topic related to media and society, research their topic, develop a short audio program in the form of a podcast and publish their work along with their fellow classmates from the participating international campus locations. A main goal of this project was to provide a common cross-site academic activity that all Webster University campus locations could participate in. This project is intended to be an independent modular assignment / activity that can be adopted by any media (related) course, and therefore is not limited to a specific course offering, but can be adopted by faculty in which this assignment meets a curricular goal or active learning experience. Finally, the presentation offers best practices when designing a project that involves differences in terms of location, culture, resource, technological proficiency, and time zones. Attendees will benefit from hearing about challenges and opportunities that were encountered and the solutions that emerged from group discussion and collegial collaboration. While the project itself was developed by instructors who teach courses in media, many of the students involved in the project were not media majors or had little to no prior knowledge of how to produce a podcast. This presentation will also address how to mitigate such possibilities.

References:
[1] Ashraf, H., Noroozi, S., & Salami, M. (2011). E-listening: The Promotion of EFL Listening Skill via Educational Podcasts. 6th International Conference on e-Learning (p. 10-16). Canada: University of British Columbia Okanagan.
[2] Çölkesen, D., & Bedir, G. (2016). The use of student-produced educational podcasts in foreign language vocabulary teaching. International Journal of Research in Education and Social Science 1, (3), 2415-2528
[3] Forbes, D. (2011). Beyond Lecture Capture: Student-generated Podcasts in Teacher Education. Waikato Journal of Education, 51-63.

Keywords: International collaboration, podcasts in education, student-oriented learning.

Presenting the Podacast Toolkit at the 2017 Teaching Festival

teaching-fest-pres.png

It was a privilege to present to the highly engaged faculty and staff colleagues in attendance on Friday morning for our talk on Promoting Agency and Inclusion through an International Podcast Project. We received lots of great questions and enjoyed the conversation on how this project can be adapted to many different disciplines and courses.  It was also a good opportunity to discuss how the use of short-form audio recordings can be a valuable instructional tool that has high impact with low cost to produce.  I enjoyed the opportunity to play a sample form our pilot episode of the International Podcast Project as well.

For details on the presentation and other talks featured at the 2017 Teaching Festival see the entire Teaching Festival Lineup.

Pilot Episode: International Podcast Project

Following the successful inaugural International Podcast Project, my fellow colleagues and I have compiled the top-voted student podcasts from the project into the pilot episode (ep.0) .  This pilot podcast contains the peer-voted top two podcasts for each course that participated in the project.  There were a total of six courses participating including two from the main campus in St. Louis, and one course from the Leiden campus. Geneva campus, Vienna campus, and Thailand campus. 

Project Background

I will share much more in the near future on the entire project details including an resources kit for anyone who would like to take this project and adapt it.  In short this was an international cross-campus project in which the international campuses of Webster University Media Communications departments collaborated on a student podcast project. 

  • Project Themes: Media Technology, Media Convergence, Food & Culture in the Media, Interpersonal Communication
  • Deliverable: Original audio recording containing the background, research and information on the chosen subject and theme
  • Length: 3:00 minutes

Once all podcasts were created, they were uploaded to SoundCloud accounts and shared with a paired class from a different international campus.  Students then voted and provided peer feedback on the other classes podcasts.  Once the final voted list was completed, I compiled the podcasts into a single finished podcast episode for the International Podcast Project. 


Disrupting the JPEG

I wanted to share a fun activity or in-class exercise I use when teaching advanced levels of digital imaging.  Most of us are very familiar with the JPEG file type. It is a staple commodity in our daily digital lives; we post, share, download, and save JPEG image files all the time without much thought.  However, we often forget that beyond the surface level obvious use for JPEG images, we can use this file format to rekindle the organic nature of randomly effecting change in the medium to produce unexpected and uncontrolled results. 

Original JPEG Image: Taj Mahal

Original JPEG Image: Taj Mahal

Disrupted JPEG Image

Disrupted JPEG Image

This exercise was originally based on the tutorial: "Breaking the JPEG - by Stephen Hislop of Computer Arts Magazine" before the magazine's web presence changed CMS's and lost the imagery from the post.  Please feel free to follow this exercise yourself and have some fun, or to re-purpose it to fit your needs (assuming you are teaching a class or course on digital images or compression etc.) I included a short video tutorial so you can see the steps below in action.

Purpose

The Purpose of this activity is to give participants a chance to take a closer look at the code that is generated by the JPEG image compression format, and to gain an understanding of what happens when we change that code in random, arbitrary ways.   This activity also provides each participant the tools to create unique and "organic" works of art that defy the original code structure of the JPEG file by disrupting the source code. 

You might be asking how are we going to do this?  Well, we’re going to tear an image apart from the inside out and then put it back together.

Step 1: Source image

To begin with, select an image file (*.jpg, *.jpeg) that you would like to use.  This activity works better if you choose a lower resolution image (web-sized) since the amount of code will be reduced in the file.  I personally recommend an image around 800-1,500px in the longest dimension at a resolution of 72ppi.  You can of course experiment with all kinds of sizes and resolutions once you have the process down. For this tutorial I'll show you the image I used along the way.  Due to the trial and error approach to this activity, it's a good idea to use a source image, and them make copies from it to experiment with.

Source Image JPEG file (1500 x 787 px @72ppi)

Source Image JPEG file (1500 x 787 px @72ppi)

Step 2: Convert JPEG to Text

Once you have your source image you will convert the image to text by renaming the file extension. 

  1. Right click your image file and select "Rename"
  2. Replace the ".jpg" file extension with ".txt" to convert the image file type to a text file.
  3. You may get a pop-up warning dialog box asking if you want to replace the file extension - select the option to use the new ".txt" extension.
  4. Your image file thumbnail image may have already changed to a text icon.  Now select your image text file and open the file with a text editor (TextEdit on Mac or Notepad on PC etc.).
Rename file: change extension to ".txt"

Rename file: change extension to ".txt"

Yes - we are sure we want to ruin the file ;)

Yes - we are sure we want to ruin the file ;)

Step 3: Get your hands dirty

  1. With the file open you will see that the image has been converted to a mess of tortured looking text, what you are actually seeing is the ASCII representation of the file code.  All of those lovely 1's and 0's are still there of course, but since we used the ".txt" extension we see what those bytes look like as text characters.
  2. Now comes the fun part - scroll down through the image roughly to the top 1/8th of the document.
  3. Make a selection of the code and copy/cut the code (big or small does not matter, you can vary the size as much as you like).
  4. Scroll down a ways (roughly another 1/8th of the way) and paste the code.
  5. Now try and grab another section and copy it (but leave in place).
  6. Now scroll to a new location and paste it in.
  7. Repeat these steps (3-6) a few times until you have jumbled up some of the code.
Grab random sections of code and copy/cut/paste the code to new locations

Grab random sections of code and copy/cut/paste the code to new locations

***Hint: When you are first trying this out, I would start off by making only a few changes maybe 3-4 changes and then see how it turns out.  There is no "rule" for this, so you will need to experiment with different amounts of code and whether you are copying or cutting etc.

The main thing to keep in mind during this stage is that all of this code represents corresponding parts of the image, so the bigger chunks of code you take the bigger (or more pixels) you will be disrupting.  Another tip would be to stay away from altering the very top 1/8th or very bottom 1/8th of the code, that seems to corrupt the image more often than not.  But again, you are free to experiment.

Step 4: Return from whence we came

Now that you have changed up the code its time to put this file back to an image file type.

  1. Save your work in the current form of the text document to lock in your code changes.
  2. Now reverse our file naming process from Step 2 -
    1. Right click the file and select "Rename"
    2. Change the file extension to ".jpg"
    3. Confirm you want to use the "jpg" file extension if prompted by a warning dialog box.
  3. You will now have a disrupted JPEG image file.  You can preview your file and see the wondrous "random" effects your copying and pasting had on the image. 
  4. If you are unsatisfied with your first try, try again, or choose a different image.  The point is to keep experimenting.  Once you've learned the process it only takes a few minutes to go through the entire image transformation.  Below I included a few results from the source image used in this tutorial. 

If your image is completely broken (which happens a fair amount) you might have broken parts of the code near the top or bottom of the file resulting in an image so disrupted it is no longer recognizable as an image.  In this case don't sweat it, just grab another copy of the source image and try again, but use less aggressive changes, and try and stick to the middle of the image where the code is "safer". 

You might have a scenario where you can preview the image fine, but it wont open in an image editing program like Photoshop.  Again, no sweat, just grab a screen shot of the preview and now you have a "clean" image file of the disrupted one. 

Step 5: Turn it up to 11 (optional)

  1. Now that you have a fun disrupted image you can further the enhancements to this by opening the file in Adobe Photoshop or whatever image editing application you like.
  2. You might look to enhance colors - make custom selections on the broken segments and alter them to your hearts content.
  3. Have fun! :D

Like what you created? Share it! Feel free to tweet your creations at me, or share via Instagram - @seanthenerd #DisruptedJpeg


Summer Photography Workshop 2016

PHOTOGRAPHY SUMMER WORKSHOP
Travel & Street Photography

This summer I am teaching a fun and exciting photography workshop focused on the contemporary methods and techniques for shooting and post-processing travel and street photography. 

During the course students will be putting their knowledge of photography into action through a series of small photographic assignments in cityscapes and street photography to prepare them for a final production assignment to capture a "City Portrait" of a city/town of their choosing. 

Creating a City Portrait

To accomplish the goal of the final project, students will be asked to create a final image series that encompasses several aspects of the city to help create a complete "portrait" of that location.  In addition to the visual elements of this assignment, students will also write short exposes on each of the main segments of their series to provide a rich context to the images. 

The City Portrait includes:

  1. A cityscape that captures the essence of the city through its architecture, or city planning, and or the the atmosphere of the city.
  2. The people that make that city.  Who are they? What do they think of their city? Is there any interesting characteristics of the people that stand out from other cities near or far?
  3. Food and culture: Looking even closer at our city, what is behind the people, what do they do, where and what do they eat?  Where do they shop or go for entertainment? The final segment will focus on the culture of the city.  Get close, observe and capture the food, the coffee, the shopping etc. that fuels the city.  Are there specific places that "everyone" goes to enjoy a meal, what about the shopping, do people shop in large department stores or small locally owned shops.  Is there a "must eat" or "must try" local delicacy or traditional drink? Find out, and photograph it, capture the "essence" of what makes it unique.

Interactive Leiden Photohunt

Another feature of the class designed to give students a task that would get them out and about in the city, as well as give them locations to practice the photographic techniques discussed and learned in class was a city-wide photohunt.  Similar to a scavenger hunt, there are several (10) locations marked throughout the old city that students need to "capture" with their camera.

If you would like to use the Photohunt please feel free, this map was created using Google Maps custom map feature and has been made publicly available.  Whether you want to join in the fun of photographing the city of Leiden, or just want a map to share with visitors of "must see" please feel free to share the map. Alternatively you can make your own for your city, or one you will (or have) traveled and photographed.

I'll end this with a few words I often say in closing of my photo classes. Good luck on your photo walks, don't forget to look up, and if you're not having fun, you're doing it wrong. 

Webster University Graduation 2016

Graduation season is my favorite time of the academic year.  It is full of the excitement of students realizing the major milestone they have just accomplished, mixed with the anticipation of the unknown next step into the "real world".  As an educator it is also a bittersweet moment to join in the celebrations of the accomplishments of your students, but also to say goodbye as they embark on their next journey.  It is a great moment to reflect on the previous year and recall the successes both in and out of the classroom.  Of course this is also a great time to identify areas of improvement for the next year, next class, or next cohort.  I truly believe that each year we build upon those before and continue to iterate ourselves as educators, and administrators of higher education.

I feel very fortunate to have had the experiences to preside over my students graduation in a special historic venue located in Leiden, the Netherlands.  The commencement ceremony is held each year in the historic Pieterskerk an early 12th Century Gothic Church dedicated to Saint Peter known informally as the "Pilgrim Fathers Church".  It is a rather special experience to address the audience of graduates, parents, families, and staff from the nearly 900 year old floor and to hear the audio echo off of the impressive chambers and pillars. 

While the students will be missed in class, and in the halls, and around campus, I am very proud of our graduates who will be continuing to work hard to make a positive impact on our global community.  Our graduates are headed in many directions, all across the world, be it through employment opportunities or the continued pursuit of knowledge in a graduate schools. 

Media Communications Graduates Class of 2016    |    Webster University, the Netherlands

Media Communications Graduates Class of 2016    |    Webster University, the Netherlands

To all of our bachelors and masters graduates from the Department of Media Communications I wish you all the best, and know that you are now part of a wonderful Webster University Global Community of Alumni. 

NASA Space Apps Challenge 2016

I recently had a wonderful opportunity to participate in this years NASA SPACE APPS CHALLENGE hackathon as a jury member for the ESA SBIC location in Noordwijk, the Netherlands.  I was already familiar with the event from the previous year, but this was the first time I was able to officially participate.  I had a wonderful time meeting the fellow jury members, and most of all meeting all of the participants and getting to see all of the creative and innovative proposed solutions to this years set of NASA challenges.

NASA SPACE APPS CHALLENGE 2016

NASA SPACE APPS CHALLENGE 2016

To better understand how this event works, NASA releases a set of challenges that range in scope and complexity for a community of "thinkers or hackers" to work together and come up with creative solutions. 

Global Community, Out-of-this-World Innovation
For 48-72 hours across the world, problem solvers like you join us for NASA’s International Space Apps Challenge, one of the largest hackathons in the universe. Empowered by open data, you collaborate with strangers, colleagues, friends, and family to solve perplexing challenges in new and unexpected ways — from designing an interactive space glove to natural language processing to clean water mapping. Join us on our open data mission, and show us how you innovate.
— NASA Space Apps Challenge 2016

The participants gave their 4-minute presentations to the jury and peers after 48 hours of hard work, collaboration, and I'm sure many energy drinks. It was a hard group to judge since there were so many strong ideas.  In the end three groups were selected to move to the next round of the global competition. 

  • Toilettronic - a project aimed at simplifying the toilet experiences of space flight and stay at the ISS through wearable technology and gamification.  This group impressed the crowd with their "in-the-box" thinking on how to reduce the stress of toilet experiences in space.
  • Leaky Rivers - a mobile application focused on the use of public data and geographical information systems to inform the public on dangers of floods, with the aim of providing real-time warning systems for those who may be in or near areas of flood waters.
  • SenseAIR - a mobile platform using public data that helps inform individuals of their exposure to pollutants by using real-time spatial information. This group was chosen as the "People's Choice Award"

For a full look at all of the groups and their projects please visit the Noordwijk Location NASA SPACE APPS CHALLENGE 2016 page.  Currently the SenseAIR group is a semifinalist in the People's Choice Award category and is in 7th place overall.  With a little luck and some voting they have a good chance to make the finals. 

I am looking forward to next years competition and to see what the new challenges will be.  Hopefully I'll see you there.

Chalkboard Art - a creative muse

In an attempt to drum up some creative inspiration I began playing around with an idea of creating some fun chalk drawings in my Media Studio.  The idea came to me shortly after installing a "chalkboard" wall in the studio.  It is a very simple setup really; I used two coats of the chalkboard paint from a local hardware store to create the chalkboard wall measuring 1 meter by 1.5 meters or roughly (3 ft x 5ft).

After purchasing a selection of chalk, both the traditional classroom stuff and the amazingly fun liquid chalk markers I started looking for something fun to put on the wall to demonstrate how the wall can be used for fun, diagrams, or storyboarding etc. but to also show that the various types of chalk can be used for a variety of purposes.  The liquid chalk is great, but it requires water to be removed. The chalk pens came in two sizes and I opted for the larger (16mm) so now it's on my list to get the smaller (8mm) size for drawings/tracings etc. with finer details. When I started looking through the chalk and started to play around with them they reminded me of crayons as a kid, then the idea struck me, "for fun, why not put up images from an old coloring book"?.

The Process: Its super easy

Interested to make your own? It's super easy and this could be a great activity for a classroom, or with kids (of all ages) at home.  You could easily transfer this process to a "real" wall for some cool murals.  The materials needed: an image, chalk, a place to put it (chalkboard), and a projector.

The Art - What will you draw/trace?

To start with, you will need some art of course, I used a scanned image from an old HE-MAN coloring book from 1984 that I colored in digitally with Adobe Photoshop (which is totally optional, but it took the decisions out of which color to use). You can do an image search for coloring pages etc. to get a sense of whats out there.  Keep in mind your availability of colors etc. and I would suggest choosing something that is fairly simple (less details) to start with to get the process down.  Once you've made your selection get it into an image format that you can use with your projector and get ready to draw.

Setup the space

The key here is to align the image on the chalkboard just how you like it, and to lock the projector down to ensure that it won't move on you, since you will trace the image stability is key.  Tip: the fancier your projector the more flexible it can be based on distance, keystone, and scale.  See the image below of my setup, just had a projector on a nearby table and scaled the image to fit the right size.

Projector setup: note the technical use of old CD cases to get the angle "just right".

Projector setup: note the technical use of old CD cases to get the angle "just right".

Aligning the 2nd image next to the first character.

Aligning the 2nd image next to the first character.

Trace the image

Once you have the image projected, it really just becomes an easy job of tracing the image and coloring it in.  As you can see from the image above, you can get really creative by overlapping and mixing different images onto your "canvas". One trick with the coloring book style is to use negative space for the black lines in the drawing. You can see the image below for another closeup to see how the effect works. 

Notice the details are made from negative space - leaving the canvas clear of chalk

Notice the details are made from negative space - leaving the canvas clear of chalk

So as you can see, it's nothing difficult or tricky and yet you can get some really fun results.  In total, the time it took me to trace these coloring book images was about 20 minutes for each one.  An additional benefit to this being all done in chalk is when you are done, some water and a sponge and it's all gone, back to fresh canvas. I think my next version will be some 8-bit inspired video game characters. 

NASA & JPL Visions of the Future

Recently, NASA and JPL released a series of graphic design posters that illustrate some of the possible space explorations entitled Visions of the Future.  JPL has released these posters for download, they are high resolution and can be printed in full resolution up to poster size.  These posters not only showcase the imagination of a new generation of innovators and explores, but also serves as a visual inspiration to anyone interested in graphic design, or the genre of space science.  One of the attributes of this series I enjoyed the most was the style of the posters, they mimic the science fiction imagery we are used to seeing on fictional books, games, and movies, yet each of these posters depicts real world "moon shot" exploration projects into our own solar system, and beyond. 

So if you are wanting to print off your own copy, you might ask "how do I print these big"? To help answer that I've included some tips below on printing theses off at the small poster size of 13x19" (also known as Super A3).   

For printing, I used Adobe Photoshop CC 2015 and an Epson Stylus Pro 3880 Printer on Epson Premium Semigloss Photopaper.  So as mentioned above the full resolution (300 dpi) these images can be printed in full poster size of 20x30" which is rather large, and for the wall space I have in mind for these prints, far too large.  So I decided to print on Super A3 (13x19") so I could print a selected series of three images to be wall mounted side by side.  To ensure proper printing (color, resolution, and size) I used the following settings in Photoshop to print.

NASA Image Opened in Photoshop

NASA Image Opened in Photoshop

To ensure the proper print settings I used the following (see image below for more details):

  • Paper size: ensure the paper size is correct - in this case Super A3
  • Color Management: Here I chose to have Photoshop handled the color profile that was embedded in the image to match it to the preferred printer profile.
  • Printer Profile: For best results I matched the printer profile to the Epson Stylus Pro 3880 and the exact paper I was printing on (Epson Premium Semigloss Paper).
  • Size and Resolution: Here I opted to "Scale to fit Media" so I would still retain the full border less printing of the entire image on Super A3 paper.  As a result of this the final print resolution is 463 PPI which is far more than needed (300 PPI) for a great result.  
Print Selection Dialog Box - Photoshop & Epson 3880 Settings

Print Selection Dialog Box - Photoshop & Epson 3880 Settings

The result is a sharp, fun, and inspirational graphic art poster. These would look great in your home/office or classroom.  I plan to hang these above an editing station in the Media Studio to help inspire some creativity from my students.

Creating a Visual Narrative: Animal Kingdom

This multidimensional photographic project was focused around the core concept of creating a visual narrative using a set series of three images to tell a story.

PHOT 3195: Fall 2015

PHOT 3195: Fall 2015

This project was created for use in my Fall Photography 3195 Digital Imaging II course to challenge the students to first think creatively about the "story" they wanted to tell with an "animal" of their choice, and then to think critically about how they would execute their vision of this story with only three images. Below you can see the various animal "characters" chosen by some of the students. 

The Assignment

Students were given a lot of creative license to interpret the assignment in a way that was meaningful to them personally, and to tell a story they felt a connection to. The students were given a set of constraints, such as choosing from a finite set of paper low-poly animal masks, all work was to be printed in Super A3 format, and all students must create an image series of three works, no more, no less.  All of the work was to follow the distinguishing characteristics of the visual narrative:

  • contain a persuasive story with a point of view
  • high quality imagery, still or moving
  • subject matter with pressing social, environmental, or spiritual value
  • an appeal (explicit or implicit) for transformation in attitudes and behaviors

The Masks: The low-poly masks are a component that I have worked with a few times before, and it is a rewarding object to use, as students assemble and decorate the masks however they like, and the ease of which they can be put together makes them very accessible, even to students who claim not to have any skill in the "arts".  The masks come from http://wintercroft.com/ where you can choose from a growing selection of masks.  They are relatively simple to put together, and only require cutting, gluing, and taping (and in some cases using some push pins) and can be assembled in a couple of hours. One of the reasons this element was incorporated into the project was to provide a prop element for the students to use when creating their work.  This provided an added element for their execution of the project, by working with elements that needed to be shot correctly in-camera and balancing the work load from in-camera and post production. 

Below you can see a few of the student projects (in no particular order).

Wolf Mask: Amanda Cochran
Hare Mas: Yogesh Sajnani
Bull Mask: Daniel Cuadra
Owl Mask: Kylie Luteraan
Stag Mask: Valentine Billette de Villemeur